Designing an organic garden layout for maximum yield takes a bit of game planning, practical skill, and a clear picture of what you want from your outdoor space. I’ve spent several seasons adjusting my own veggie beds, and I can say that a little foresight and mapping lead to a garden that’s way more productive and easier to keep up.
Understanding Organic Garden Design Basics
A productive organic garden isn’t just a random patch of plants—it’s a living system where soil, sun, water, and plant relationships are all clicking together. An organic approach means you’re building soil health, picking plant varieties that thrive without chemicals, and making the most of what nature offers. Like most gardeners, I want healthy crops but also less maintenance and fewer headaches. This all starts with a good layout.
Organically managed gardens often use crop rotation, companion planting, and efficient use of space. According to the USDA, organic farming is growing rapidly as people seek sustainable, chemical-free ways to feed their families and communities. Whether you’ve staked out a small backyard patch or a bigger piece of land, the core ideas stay the same
Picking the Most Efficient Garden Layout
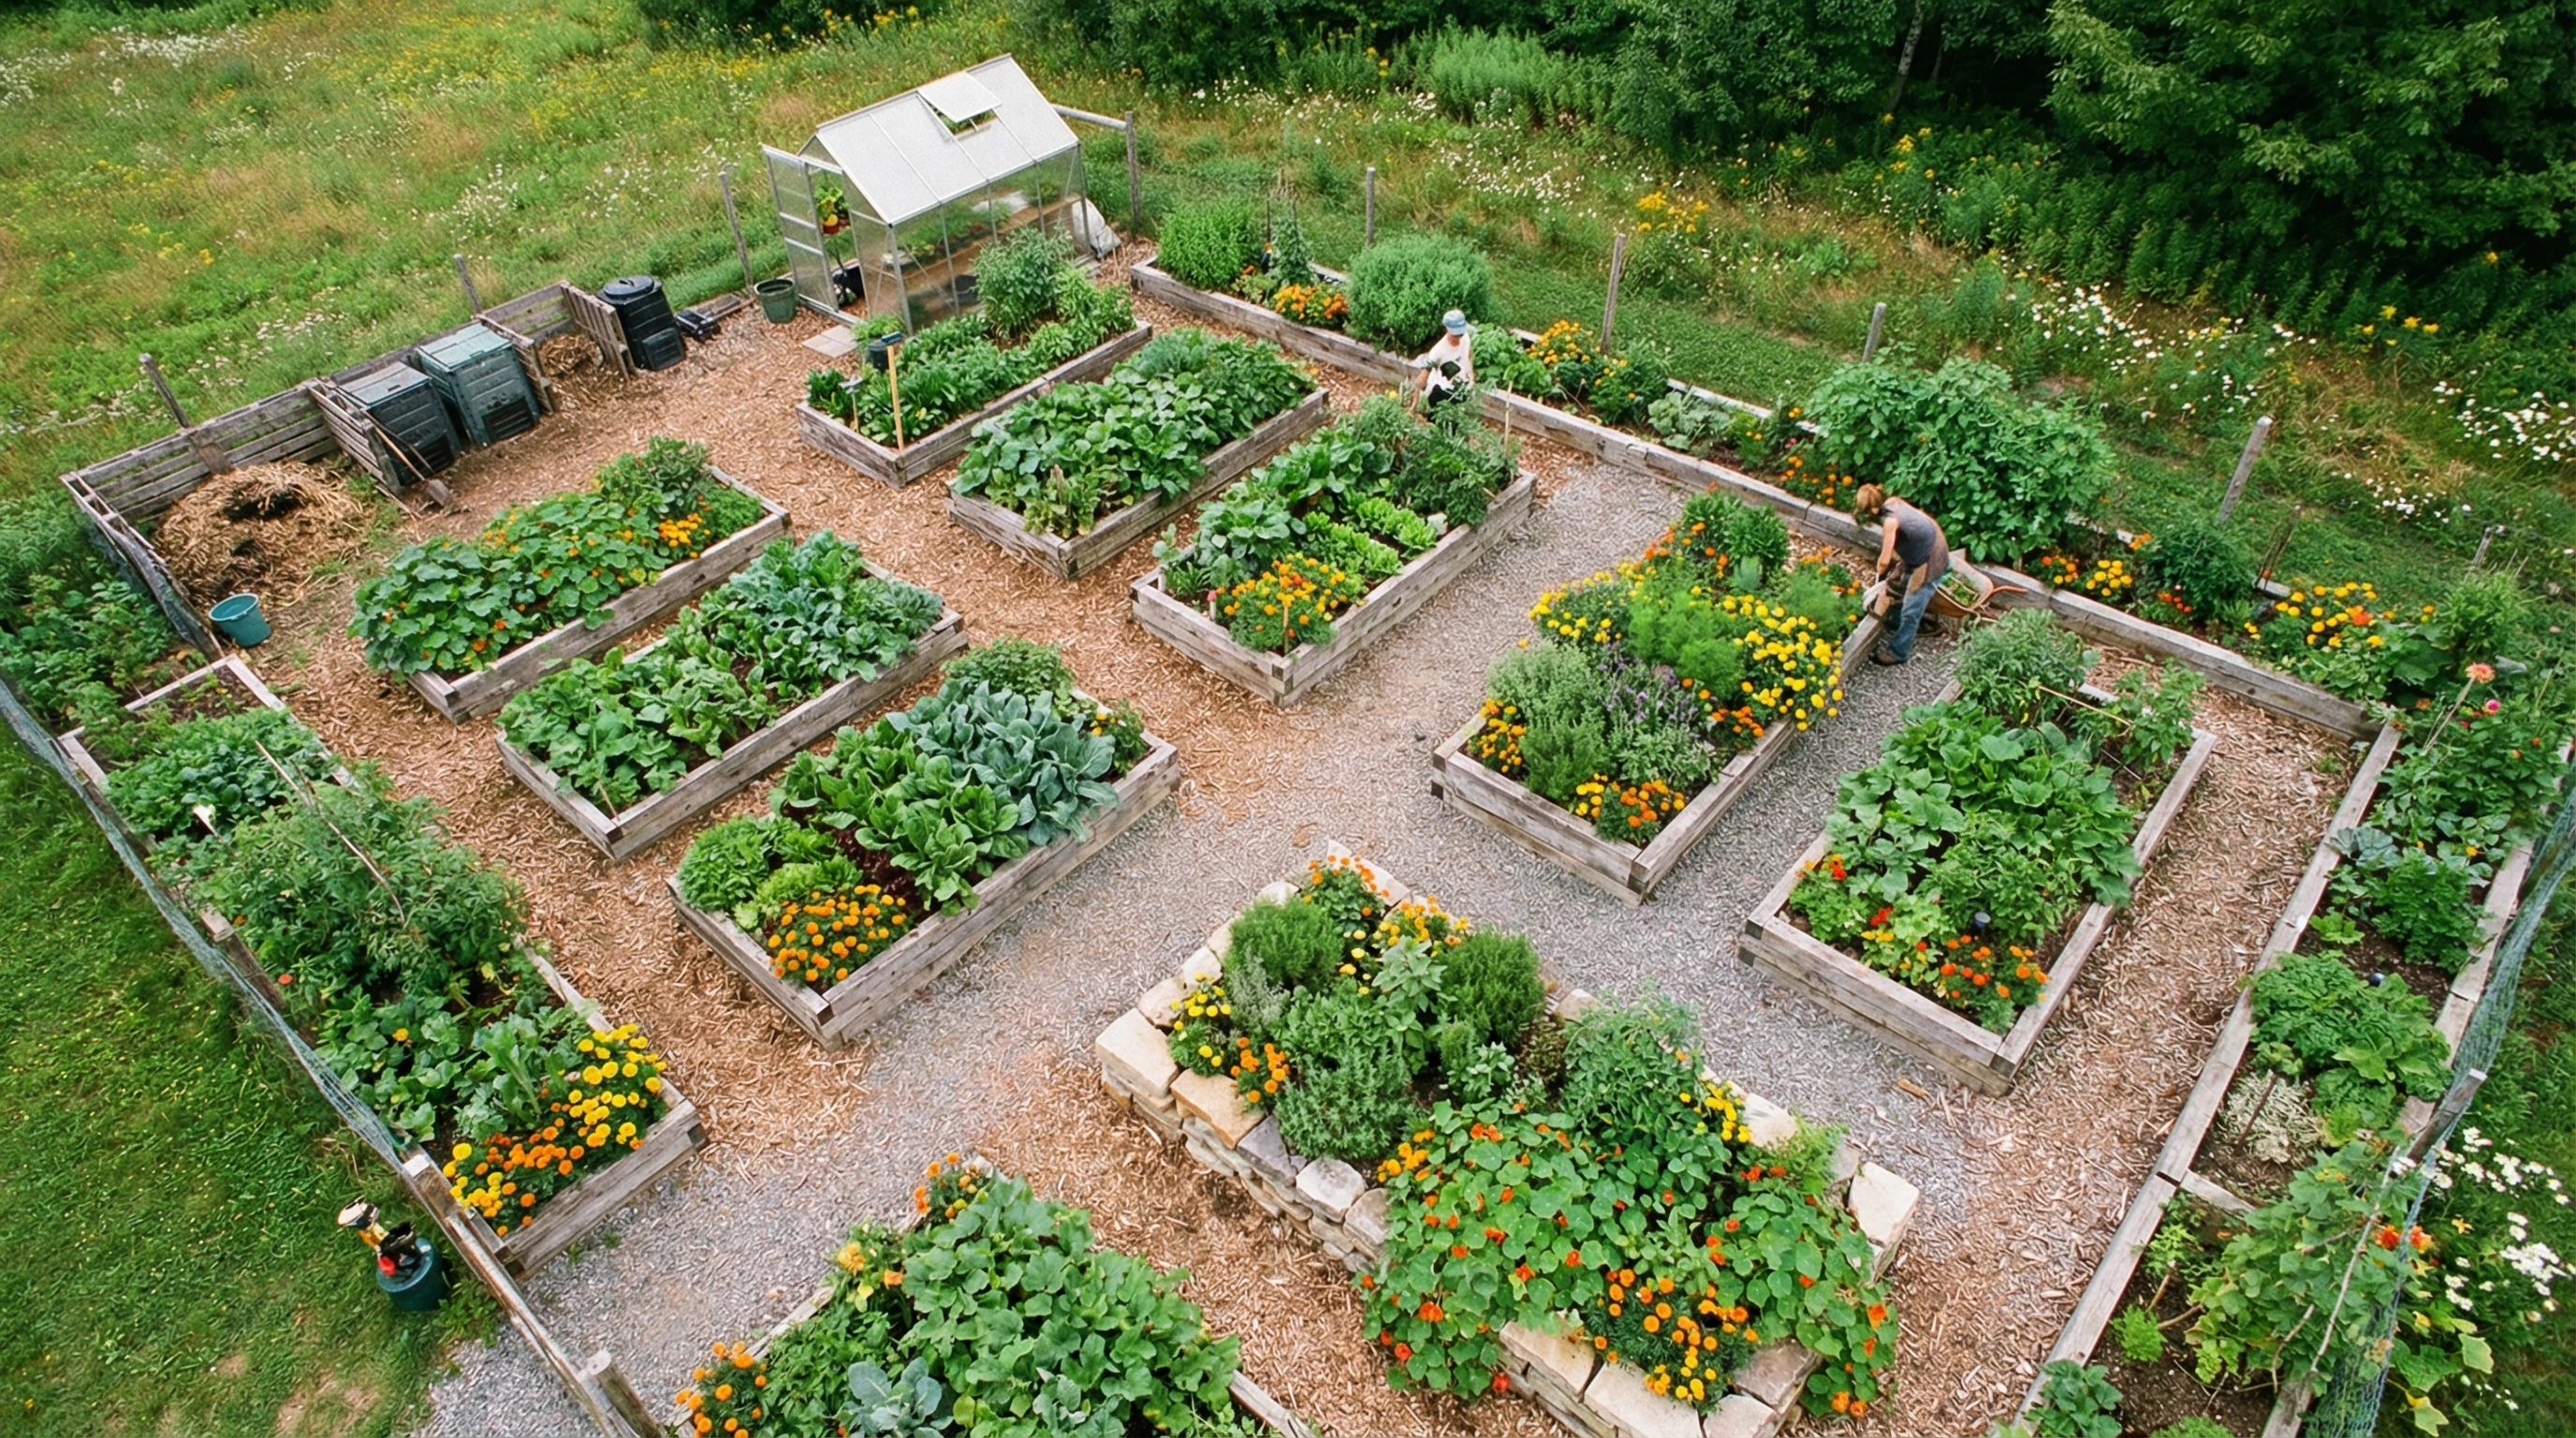
If high yield is the goal (and let’s be honest, who doesn’t want a basket full of tomatoes all summer?), the layout you choose has a major impact. Square-foot gardening, raised beds, and block planting have totally shaken up how backyard gardeners grow food. In my experience, raised beds are especially handy for controlling soil quality and squeezing the most out of your space, though classic in-ground rows can work well if you’ve got plenty of room to play with.
- Square Foot Gardening: Splits your growing space into grids, letting you pack in plenty of plants without crowding. This is super efficient for smaller gardens or anyone just getting started.
- Raised Beds: Give you better drainage, warm up earlier in the spring, and usually mean healthier plants. Mark paths to avoid stepping into planting zones and compacting the soil.
- Block or Intensive Planting: Groups veggies tightly, which smothers weeds and shades soil, cutting down on water loss overall.
The smartest layout often mixes raised beds or blocks with clearly marked paths. Leave enough room to kneel or move easily, and try not to make your beds wider than 4 feet, so you can reach the middle without stepping in. This keeps the soil fluffy and makes picking your crops way easier.
Arranging Plants for Maximum Growth
Plant arrangement isn’t just about style—it’s about making your crops thrive. Choosing the right plant combos, staggering heights, and planning for back-to-back plantings leads to bigger harvests and healthier gardens. I always keep a little logbook of what worked or flopped in past seasons; it’s become my go-to each spring.
- Companion Planting: Some plants do better together. Tomatoes and basil, carrots and onions, or beans and corn are classic pairings. Check out lists of companion plants—they can help with pest control and boost growth.
- Tall to Small Arrangement: Put taller crops like corn or sunflowers on the north or east side (if you’re in the Northern Hemisphere) so they don’t block the sun from shorter plants like lettuce or beets.
- Succession Planting: When a speedy crop is done, replace it right away. For example, once radishes are harvested, you can add summer bush beans or late carrots to the same spot.
Switching things up by mixing annuals and perennials and sprinkling in herbs or flowers brings in pollinators and makes your garden pop with color. I tuck marigolds and nasturtiums along the edges for bursts of color and pest guard—worth it for their looks and their utility.
How to Design an Organic Garden Layout Step By Step
Laying out the garden is one of my favorite annual rituals. Here’s how I go about it, whether you’re working with blank ground or layering onto an old plot:
- Map Your Space: Measure your plot and draw it out on paper. Include boundaries, walkways, fences, trees, and any shady areas.
- Mark Beds and Paths: Set up beds in rectangles or squares for easy reach. Paths should be around 18 to 24 inches wide so you can walk and maneuver tools without stomping crops.
- Think Sun and Water: Plants that crave sun (like peppers, squash, and tomatoes) deserve the brightest zones. Save partshaded zones for leafy greens or herbs. Make sure a hose is handy, or run some drip lines for a time-saving system.
- Switch Up Your Crops Each Year: Rotate what you grow in each bed annually to keep soil healthy and avoid disease buildup. Never put tomatoes in the same space twice in a row.
- Add Borders or Fencing: Small fences or sturdy edging help keep out pests and make cleanup easier when the season ends.
Leave a little extra room for compost bins, tool caches, or even a garden bench if you want space to enjoy the view or take a break from weeding.
Maximizing Yield in a Tiered Garden
If your site slopes or you’re interested in more definition, a tiered garden lets you get creative with your vertical space. A couple of my friends manage fantastic tiered veggie patches on hillsides—they swear by a few clever tactics:
- Put Each Level to Work: Top tiers have better drainage and sunlight, perfect for tomatoes, peppers, eggplants, or herbs like thyme and rosemary.
- Save Shaded Tiers for Tough Crops: Leafy greens, root vegetables, and certain beans grow great in lower sections with less sun.
- Stop Erosion: Plant groundcovers or mulch thickly so the soil stays put. Creeping thyme or clover are solid picks; they help beds stay stable and attract pollinators.
Tiered gardens also look super organized and are next-level cool, turning any hillside from an eyesore into a truly vibrant garden.
Handy Tips to Boost Yield All Season Long
With your layout dialed in, a couple of extra tricks will help your garden truly thrive. These are my go-to habits for steady success:
- Mulch the Beds: Use organic materials like chopped leaves, straw, or grass cuttings to lock in moisture and slow weed growth. As they rot, the soil gets a nutrient boost too.
- Spread on Compost: Add a thin compost layer each spring and again midseason for fresh nutrients and strong crop growth.
- Succession Planting: When one crop finishes, replant the same spot so bare soil is never wasted and there’s always something new coming up.
- Water Wisely: Hit the soil around your plants early in the day to make the most of the water and dodge leaf diseases.
Being honest about what’s working—and what could use a tweak—really does matter. I keep a quick garden log that lists planting times, harvests, and any hiccups; it’s a game-changer for prepping the next season’s plan.
Frequently Asked Questions
Here are some common questions gardeners have about organic garden layouts:
Question: What is the most efficient garden layout?
Answer: Raised beds paired with block or intensive planting methods, clearly laid out paths, and defined zones usually deliver the best use of space and robust harvests for most home plots.
Question: What is the best way to arrange plants in a garden?
Answer: Group crops according to height, sun needs, and how they grow. Try companion planting to keep pests down and start crops at staggered times to always keep your beds full.
Question: How do you design the layout of a garden?
Answer: First, map out the available space, then sketch beds, paths, and key features such as a compost bin or tool spot. Consider sun, wind, and your watering system. Rotate crops every year and mix in vegetables, herbs, and flowers for a burst of variety and beauty.
Question: How do you make the most of a tiered garden?
Answer: Top, sunnier tiers are best for crops that need lots of light. Keep leafy greens and root veggies in shadier, lower levels. Plant lots of groundcover or mulch to stop soil from running downhill and make every tier count.
Wrapping Up: Planning for Organic Abundance
Putting real detail into how you organize your organic garden pays off again and again. You’ll gather more food with less fuss, fight fewer weeds, and cut down on chasing pests and diseases. Balancing structure and creativity means you can adjust every year, and your garden just keeps getting better. Happy planting! Your first basket of homegrown veggies is always the sweetest—especially knowing you packed the most into every foot.