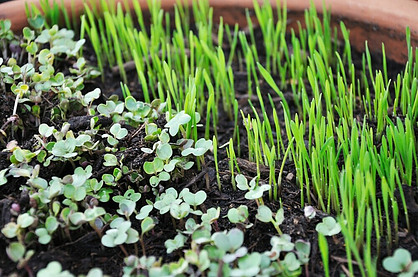
Growing microgreens has many benefits and is a welcome alternative, especially in winter when other vegetables are scarce. In addition to the fact that you only need a little space for it, the advantage is that you can grow it all year round, regardless of the climate in which you live. Microgreens grow well in beds or containers and provide a quick crop, but it’s true that you can only cut them once, and then you’ll have to sow them again.
The Reason for Growing Microgreens?
Growing microgreens is a great gardening project that ensures supply even in the winter. It is easy to grow and takes up little space, so you can also place the trough inside a windowsill on colder days. So it will always be available when you need it.
Benefits of Microgreens
Although the plants are very small, microgreens actually have a more intense flavor than ‘real’ larger vegetables and herbs. Studies also show that it can even surpass them in terms of beneficial substances, as microgreens can be up to 40 times stronger in phytochemicals.
Red cabbage stands out in particular, with the highest concentration of vitamin C, and coriander has the highest concentration of carotenoids.
Although microgreens are rich in nutrients, they are only sometimes considered a substitute for regular vegetables, as you would need to eat many of them. Nevertheless, it is a valuable and healthy addition to dishes in the cold season.
What Plants Do Well as Microgreens?
You can grow different types of vegetables or herbs, as microgreens. These are:
– kale,
– endive,
– arugula,
– beetroot,
– spinach,
– tatsoi,
– radish,
– watercress,
– peas,
– cabbage,
– basil,
– coriander,
– salad.
What Will You Need for Growing Microgreens?
– Planting tray or trough,
– A small trowel or garden rake,
– a sharp knife or scissors,
– vegetable seeds,
– a mixture of soil.
The First Step to Your Own Microgreens
Before you start, you can just think about what you want to plant in the first place. If you are doing this for the first time, it is recommended that you choose one or two types of seeds. Broccoli, lettuce, radish, cauliflower, spinach, basil, or cilantro work great as microgreens. Then, get a container to plant them in and find a nice sunny spot to put them. Also, specify the growth medium you want to use. Using a light mixture of potting soil and peat moss is recommended, as this holds moisture well in the soil.
So all you need is light, a container, soil, and water. Of course, don’t forget the seeds.
Some Seeds Need to Be Soaked in Water Before Sowing
Depending on the size, some seeds may need to be pre-soaked in water before sowing. Microgreens like kale and peas have larger seeds, while arugula, basil, and mustard are medium-sized. Herbs such as oregano, thyme, mint, tarragon, and sage have very small seeds and do not require pre-soaking.
Growing Microgreens Indoors
Choose a small container and fill it with a few centimeters of potting soil. You can also use plastic fruit wrap or an aluminum pie pan with a few holes in it to allow the water to drain. Before adding the soil, place a damp paper towel on the tray to prevent leakage.
Scatter the seeds about 60 millimeters apart and gently push them into the soil. Cover them with a thin layer of soil and spray with plenty of water.
To speed up germination, wrap the container in clear plastic wrap or a bag and place it on the sunny side of your house, where it will receive at least four hours of light daily.
When Do We Harvest Microgreens?
Microgreens should be ready to harvest in 10 days to two weeks when true leaves begin to sprout. Take the scissors and cut the microgreens slightly above the soil. Unfortunately, microgreens will not regrow after the initial harvest. For more growth, you will need new seed and reseeding.
