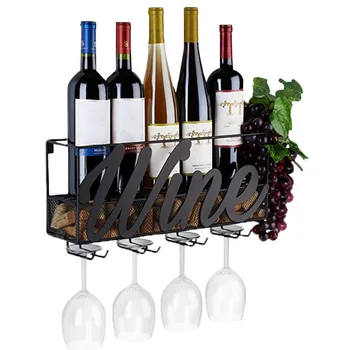
Welcome to the “How to Build a wine cellar” tutorial. Planning and building a wine cellar is a fun and exciting experience. The process gets the creative juices flowing like an endless array of design possibilities to capture your style and taste.
An excellent place to start is asking the question of the purpose of my wine cellar beyond the obvious to store and preserve my wines. How do I want to utilize my space? The basic cellar is a simple yet functional approach designed to maximize the number of bottles in the smallest space possible. We also have a moderate cellar where collectors can see and appreciate their wines while having some wines and wine-related objects on display. And finally, there is the showcased cellar, where there is room to invite guests to share their passion for wine with space for tasting and elaborate design options. So what kind of cellar will you build? Here you can find a strategic approach to building a wine cellar by addressing the critical construction considerations that need to be made to build an efficient and practical cellar for storing your wines.
Be Practical When You Build a Wine Cellar
When reading this text, keep in mind you should never build a cellar where power or mechanical failures may ruin your wine. Avoid building a cellar in a garage and other uninsulated rooms. The cooling system needs to be regularly maintained about every two to three months. Please consult a wine cellar professional before you begin construction on your cellar. Alright, let’s get started. As you may know, the proper environment for the preservation and maturing of fine wines requires controlling both the temperature and the humidity. The ideal wine condition maintains 55 degrees Fahrenheit and relative humidity of 50 to 70%. A temperature higher than 55 will cause your wine to age too fast, and lower than 55 will cause your wine to age slowly. Likewise, a humidity higher than the proper amount may cause mold to grow, and a lower than the proper amount may cause corks to crack. Your cooling system should be designed specifically to maintain this delicate balance and optimize your cellar to the ideal conditions needed to store wine.
Space for Your Wine Cellar
When choosing a space for your wine cellar, you want to keep a few things in mind. I hope that you have a choice to choose a room with its little exposure to direct sunlight as possible. You’re also going to want to note which walls are interior walls and which ones are exterior. This fact will determine how much insulation is required and where to install a vapor barrier. There are three types of systems you can use to cool the cellar, and each has its variables to consider.
Think About the Cooling System When You Build a Wine Cellar
A self-contained system is the most economical and easiest to install. They’re designed to mount between the studs of the existing wall. American installation technician wanted that the system blows the cooler into the cellar. The other end consumes heat from the cellar and exhausts the warmth into an area near the cellar. Self-contained units are noisier than a split or ducted system. Split systems are often the most efficient way to cool a cellar. Cooling unit condensers are typically noisy and require significant space for ventilation. In most examples, the cellar situation does not include a space for these purposes. By dividing the cooling system, the condenser can be located in a space better suited for heat and noise dissipation, while the quiet evaporators can be located in the cellar. A ducted system can be a self-contained or split systems and typically have more insulation options and flexibility. The system may be installed up to 25 ducted feet from the cellar, with the cooling air moving from the cellar and the heat exhaust sector to the outside of the home. Ducting is also a more elegant choice for wine connoisseurs who don’t want to have a cooling system in the cellar. The sound of the unit will be reduced or excluded depending on the installation. Standalone unit evaporators and supply ducts should all be fixed within 18 inches of the ceiling. All units require a dedicated 110 volts 20-amp circuit to ensure the unit has the usual amount of amps to run at all moments.
No matter what type of system you choose, you will have to vent your heat somewhere.
Here are several points to take into attention. Ordinary cooling systems should be able to cool up to 55 degrees cooler than the temperature on the exhaust side of the cooling system. Some models even have a thirty-degree differential. So, for example, to maintain 55 degrees in the cellar, the exhaust room cannot exceed 110 degrees. If the exhaust room does exceed 110 degrees and goes up to, say, 115 degrees, then the cooling system will only be able to cool the cellar up to 60 degrees. That’s why using a room with adequate ventilation on the exhaust side of the cooling is one of the most important factors in building your cellar and installing the cooling system. Also, keep in mind that a good cooling system should be designed to maintain relative humidity between 50 and 70 percent. In high humidity, the environment unit removes excess humidity from the air and dissipates this moisture through the condensate evaporates system or optional drain line. However, a good cooling system does not create humidity.
Dry Environment in Your Wine Cellar
But keep in mind that you will probably need to create humidity within the cellar if you build a wine cellar if you live in a dry environment. You can do this by using a non-heat humidifier or installing a small decorative fountain within the cellar. Standard air conditioners rapidly cool the room, but they may disturb your wine and strip the humidity from the air in doing so. That’s why the proper cooling systems are designed to slowly bring your cellar to the proper temperature while maintaining relative humidity through a process of heat absorption and disbursement. To frame the room, use standard 2×4 or 2×6 construction methods and ceiling joists following local and state codes and cellar guidelines. Remember, the thicker the walls, the better the insulation value. Also, keep in mind that You must insulate all glass and that if you choose to have glass in your cellar, it may require you to use a larger cooling unit due to the poor insulation value. Apply six-millimeter plastic sheeting to the warm side of the cellar walls to create a vapor barrier. Ideally, you should apply this to the outside walls and ceiling. But if this is not possible, try to perform insulation inside.
Vapor Barrier in Your Wine Cellar
The importance of a vapor barrier cannot be overstated. In high humidity, areas prevent warm moist air, which can cause mold to enter the cellar. In dry areas, it helps maintain proper humidity in the cellar. You must seal all concrete walls and floors with the sealant, such as a dry lock. The unit requires that the walls and ceilings be insulated. Fiberglass, grid foam, and blown-in insulation can all be used. You should apply a minimum of 13 inches to the inside walls of a cellar. Exterior walls may require 19, depending on the wall thickness. A minimum of 19 is required for the ceiling, but 30 is highly recommended. Keep in mind that concrete is not an insulator, and we do not recommend using it if possible.
Door to Wine Cellar
Install an exterior grade door using weather stripping on all four sides of the door jamb. A sweep or threshold is required for a tight seal and to prevent cool air from escaping.
Lighting In Wine Cellar
Light can produce a tremendous amount of heat, so we recommend using low-voltage lights such as LEDs or fluorescence. Be sure not to compromise the vapor barrier when installing a light in a ceiling. Motion sensors and timers should be used to prevent the light from being left on when no one is in the cellar.
Wall Covering In Wine Cellar
Standard sheetrock is acceptable on your wall. However, many seller contractors prefer to use green boards due to their moisture resistance. A PVA paint formulation will provide a durable finish and help to work as a vapor barrier. Tongue-and-groove wood paneling is also an attractive option for wall covering. Use rot-resistant wood such as redwoods and cedar, which will breathe in the cool, damp environment in the cellar. This may be left unfinished or unsealed. However, spilled water or wine will discolor.
Flooring in Wine Cellar
You can pick from different types of flooring—slate, marble, tile, or vinyl. The carpet, however, cannot be used because it will mold and mildew in a cold, damp environment.
Racks in Wine Cellar
Racking may vary significantly depending on your style, taste, budget, and use of the cellar. Racking is usually made of mahogany, redwood, or cedar. It would be best to focus your attention on the bottle sizes, capacity, and display options.
Build a Wine Cellar – Summary
Positioning: Remember to choose a room that doesn’t receive direct sunlight
Venting: Choosing a room with adequate ventilation is key to proper climate management
Cooling system: Standard air conditioners are unsuited for cooling a wine cellar
Framing the room: The thicker the walls, the better the insulation value
Vapor barrier: A vapor barrier protect your cellar from mold and keeps the humidity at the proper level
Insulation: The better the cellar is insulated, the easier it will be to maintain the proper climate for your wine
Lighting: Use low voltage lights on a motion sensor to keep the heat at a minimum
Wallcovering: Make sure to use rot-resistant woods such as redwoods and cedar
Here you can read more about wine cellar design.
